
You'll find this page to be most informative if you are new to going gluten free, even if you are experienced at GF baking there is bound to be some useful information on this comprehensive gluten free page.

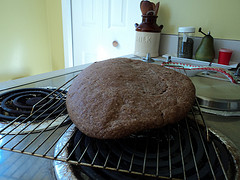 Can you remember your very first attempt at making gluten free bread, I call it the brick, does this sound familiar? When you first try to make home made gluten free breads and pizza bases, they can tend to be heavy, dry and so disappointing to eat that many people who allergic to gluten often give up on making their own bread all together. I’d like you to understand that it does not have to be this way, you need to remember that it all comes with experience, like everything else in life.
Probably the most important thing to learn if you want success is to understand in making gluten free dough is how wheat flour is traditionally used to make bread, and in particular how to substitute conventional (gluten containing ) wheat flours with their gluten free alternatives.
By altering the traditional bread making method accordingly, it is definitely possible to make your very own delicious gluten-free bread. In fact, the strange thing is that gluten-free bread is actually easier and much quicker to make than wheat bread! By using the method I describe, you can also successfully make bread rolls, and use the dough base for specialty breads such as the Italian foccacia and very nice gluten free pizza bases.
The main reason why wheat flour is used in bread making is because it is rich in the protein gluten. Gluten is actually a very stringy and sticky protein which is developed by the adding water and kneading the dough. It strongly binds the ingredients in the bread dough together, which causes them to be trapped, gluten also stretches around the trapped bubbles of air which is produced by yeast. No doubt you will be most familiar with those trapped bubbles of air in bread, this causes the dough to swell and to rise which helps to form the characteristic light and open texture once it has been baked.
Once this soft, light and doughy mix is baked, it turns into a very agreeable and hard to resist product called bread. The bland flavour and soft, fine texture of wheat flour also contributes to the delicate texture and neutral flavour of the wheat bread.
Now here is where the biggest problem lies in baking a successful wheat and gluten free bread – the actual proportion of the wheat flour in bread when compared to other ingredients is much greater than the proportion of the wheat flour used in conventional cakes, pastry and biscuits when compared to their other ingredients, and for this reason it becomes much more difficult to substitute the gluten containing wheat flour successfully with those non gluten containing flours. It kind of makes sense, doesn’t it?
 A patient came to see me several years ago who was a bread baker, and he had developed a significant allergy which turned out to be a wheat allergy. He had been baking bread for over twenty years and had started to develop an allergy to the wheat flour. I had the same thing with a guy who had, and still has, one of the most successful pizza shops in small village I live in. These guys both had one thing in common, they were using flour all the time and had started to become allergic to it. John the baker started to experiment with gluten-free products and after a long period of trial and error came to the conclusion the an ingredient called xanthan gum made it possible to bake gluten free bread which had an agreeable texture and flavour.
John had worked out that by blending specific gluten-free flours (that together imitate the taste and texture of wheat flour) with the invaluable gluten substitute xanthan gum (which is a a natural gum available from all good supermarkets and health food shops), it is possible to make a gluten-free flour mix that closely imitates the important properties of wheat flour for bread making. John further discovered that when he mixed the basic ingredients which were traditionally used to make bread, such as water, yeast, salt, sugar and a little oil – it was possible to make a well risen, crusty, versatile loaf that rivals wheat bread in appearance and flavour instead of that brick.
If you are looking for an ideal basic blend, consider a combination of potato flour, rice flour and (gluten-free) corn flour, mixed with a small quantity of tapioca flour. This blend makes an ideal flour blend as a base for a for white gluten-free bread. These particular flours are white, fine, on the starchy side and sufficiently bland in flavour to allow the yeast to give the bread its familiar delicate flavour and smell. You want to avoid flours like chickpea, buckwheat and soy flour because they can be over powering and too strongly flavoured to allow the delicate yeast/flour taste to come to the foreground. I have tried to make breads with these types of flours in the past and they weren’t really successful. Try it and see what I mean.
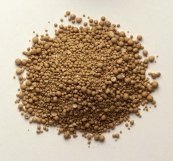
 Here is a great bread making tip, try to use versatile rice bran (available from all good supermarkets and health food shops) to add a good degree of fibre and a nice natural wholemeal colour to your blend of white gluten-free flours. You will find that the delicate flavour of rice bran will ensure that your brown bread has the look, texture and taste of real brown bread, yet remains gluten free.
 Xanthan Gum
What on earth is xanthan gum you ask? Xanthan gum is a polysaccharide (a type of sugar) which is produced by the fermentation of glucose, sucrose, or lactose by the bacteria Xanthomonas campestris. Relax, it is safe and very commonly used as a food thickening agent and in addition is widely used as a stabiliser. Xanthan Gum is often found in salad dressings and sauces where it helps to prevent oil separation by stabilising the emulsion, but it is not an emulsifier in itself. It is also used in frozen foods and beverages and helps create the pleasant texture in many ice creams you love. Some toothpastes and cosmetics contain xanthan gum, where it serves as a binder to keep the product uniform.
Xanthan gum is the real key to successful gluten free bread baking. When mixed with water, this stuff becomes rather gluey and elastic, very much like gluten, which provides the binding and stretching properties that gluten-free flours lack. You will authenticate that doughy and stretchy property that gluten doughs have about them, and therefore achieve a similar result as if you were using “real” wheaten flour. When xanthan gum is added in small amounts to gluten-free flour, it tends to give gluten-free bread dough that amazing ability to actually trap and support the large bubbles produced by the yeast you add.
This is essential for gluten-free bread dough to rise and lighten like bread made with wheat flour, it helps you to stop making those “bricks” you probably made when you first attempted to make gluten free bread. Remember? Without xanthan gum, gluten-free bread dough is only able to support very small bubbles and becomes rather dense and tough. Large bubbles simply rise and escape through the surface, resulting in dense, unrisen, close-textured bread. The better the texture, the more likely you will enjoy the experience.
 Baker’s Yeast
Adding yeast to bread dough is essential for the overall texture, appearance and flavour of your gluten free bread. When mixed with flour, water, and a little bit of sugar, the yeast starts to reproduce and when it does it starts to produce the large bubbles of carbon dioxide that cause the bread dough to rise and form its characteristic open and agreeable texture.
To lighten the dough as much as possible, raising agents which fizz with tiny bubbles on contact with water (like baking powder, bicarbonate of soda and cream of tartar) are often included in gluten-free bread recipes to lighten the dough as much as possible. Personally, I don’t recommend using them because your bread can be left with a fine crumbly texture and even an unpleasant bitter after taste. Stick with a good quality baker’s yeast if you want that traditional bread taste, texture and smell. You will want to avoid yeast and bread in general if you have a candida yeast infection.
 Oil
OilAdding a little neutral flavoured oil or olive oil to bread dough enriches the flavour of bread and helps to keep it fresh for longer. I like to use sunflower oil for a lighter bread, but the olive oil is fantastic for those foccacia or textured breads where you want to add olives and/or a few finely chopped sun-dried tomatoes, etc. Feel free to experiment, there are many different oils you can use to bake bread such as rice bran oil.
 Water
WaterUse tepid water to form a well developed crust. I prefer to use a pure water for optimal results, and try to avoid water with fluoride or chlorine, believe it or not you will notice the difference. The water contributes to the overall flavor and appearance of gluten-free bread and allows the yeast and sugar to grow and rise. No or too little water will ensure you make nice rock hard bricks. Milk and even buttermilk can be successfully used in your bread recipes also, but it may interfere with the rising process of your gluten-free bread and can help to produce a finer textured and more slightly “cakey” type of bread with a softer crust than if you were using water.
Again, only experimentation and trial and error will give you the kind of results you are looking for. One of my gluten-free friends mentioned to me that you need to bake one thousand loaves in your own kitchen before you really get the hang of making perfect gluten-free bread at home for a much better price than that fancy retail stuff.
It is important for you to be aware that there are two major differences in the way that wheat flour and gluten-free flours behave, and these two fundamental differences very much affect the method for making gluten-free bread:
Once you get the hang of it, gluten-free dough is spooned into the loaf tin (remember, it is not a dough like the gluten offering) and placed straight into a hot oven. Before you know it, the dough begins to rise and will double its original volume as the yeast begins to produce the bubbles, which don’t have time to escape.
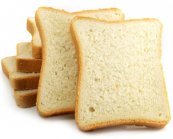 Gluten-free white bread
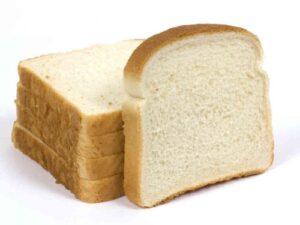
Here you will find my recipe for gluten-free white bread. This everyday loaf has a neutral and delicate flavour very similar to wheat bread and is very quick and simple to make. Use like conventional bread for making sandwiches, toast and to accompany soup and other light dishes. The bread is also nut and dairy free.
To make a 900g (a 2lb loaf)
1. Preheat the oven to 200C/ 400F. Lightly grease and lightly flour a 900g loaf tin. (tipping out any excess flour).
2. Once the oven has come up to temperature, sieve the flours, salt, sugar and xanthan gum powder into a medium sized mixing bowl. Stir in the yeast granules. Make sure the yeast is mixed in properly to avoid pockets of yeast activity and uneven rising.
3. Measure 350ml of tepid water. (about 37 degrees Celsius)
4. Pour 300ml of water onto the dry ingredients, add the oil and beat the mixture with a wooden spoon, until smooth. The dough should be firm enough to hold its shape but soft enough to fall slowly from a spoon. If the mixture seems too firm or dry, beat in the remaining water, plus a little more if necessary.
5. Spoon the bread mixture into the prepared loaf tin. Smooth the surface of the bread mixture with the back of a large spoon dipped in water. Sprinkle over the millet flakes or seeds and place on the middle shelf of the preheated oven to rise.
6. Bake for 45–60 minutes or until the bread is crisp and golden brown on all sides. If the base and sides of the bread are pale, place the bread upside down in the tin and return to the oven for 10 minutes. The bread is cooked when all sides are brown and firm and the underside of the bread sounds hollow when rapped gently with your knuckles.
7. Remove the bread from the tin and place it on a wire rack to cool. Do not slice the loaf until it is completely cold. Eat really fresh, store for up to two days in an airtight container or slice and freeze in a sealed plastic bag.
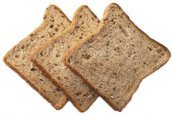
I prefer brown bread, you get more fiber and a higher nutrient content in general. To make a great gluten-free brown loaf, simply replace the caster sugar in the above white bread recipe with dark brown sugar and 55g of rice flour with rice bran (available from all good supermarkets and health food shops) and make as above.
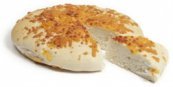 Just copy the same recipe as above for gluten-free white bread but use olive oil, and spoon into a greased and floured 20cm round cake tin. With the back of a wet spoon, spread the dough out to fill the tin evenly. Using the back of a wet teaspoon, make shallow indents at regular intervals on the surface. Drizzle 1 tablespoon of olive oil over the bread mixture and sprinkle with a large pinch of sea salt crystals and ½ tablespoon each of roughly chopped fresh rosemary and thyme. Bake in the oven for 30–45 minutes or until risen, crisp and golden brown. Turn the loaf out onto a wire rack to cool.
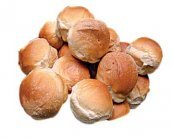 Again, just follow the recipe for white or brown gluten-free bread but instead of using a loaf tin, using a large wet spoon, neatly place heaped tablespoons of the bread mixture onto a greased and floured baking tray. Smooth the surface of each roll with the back of the wet spoon and sprinkle with millet flakes, buckwheat flakes, poppy seeds or sesame seeds. Bake in the oven at 200C/400F for 15–20 minutes or until crisp and golden brown on all sides.
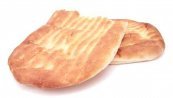 Gluten-free flat breads are so easy to make, they would have to be probably one of the easiest of all gluten-free offerings you can make and bake. Try this simple recipe: 1 cup of buckwheat flour, 2 tablespoons of olive (or other oil) if required, 1/4 teaspoon of Celtic sea salt, soy milk, rice milk, almond milk or other milk alternative. Add the oil and salt to the flour, Stir in just enough milk to make a thin batter. Mix together and pour in small quantities onto a heated skillet and lightly brown on both sides. Cool and enjoy, or freeze for later.
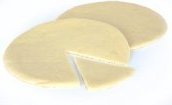 To make two large or four small pizza bases, follow the recipe for gluten-free white bread, using olive oil and preheat the oven to 200C/400F . To make two large pizzas, divide the dough between two baking trays, greased and floured with rice flour or cornmeal, spooning it into the centre. Using the back of a wet spoon, spread the dough out into two circles, measuring approximately 25cm across and just under 1cm thick. Drizzle each pizza base with 1 tablespoon of olive oil and bake in the preheated oven for 20 minutes or until golden brown on both sides. When made and cooked properly (be careful not to overcook the pizza – easily done) The pizza bases have a delightful chewy taste and are great to eat just drizzled with olive oil and sprinkled with a little chopped garlic, chopped oregano leaves, sun-dried tomato and various seasonings. Great for picnics or children’s parties.
My favourite is to lightly coat the gluten-free base with a tomato paste and then sprinkle with chopped olives, sun dried tomato, a few dabs of pesto, various herbs like fresh basil, thyme or oregano, a few red onion rings, freshly sliced red peppers (capsicum) and some freshly grated mozzarella cheese. Now all we need is a glass of a nice red wine!
Alternatively, spread the pizza bases with your chosen toppings and return to the oven for another 15 minutes or until the pizza base is crisp and golden brown and the topping is melted and bubbling. Serve immediately, they won’t last too long – I can assure you. Enjoy your gluten-free offerings.