
Kefir has been a staple diet in many civilizations around the world for generations. Because of the internet, it has become extremely popular, much like all cultured and fermented foods. Kefir is high in minerals and probiotics, making it ideal for gut health and digestion.
When it comes to fermented superfoods, there’s no shortage of options: yogurt, kombucha, kimchi, and sauerkraut have all gained popularity for their probiotic benefits. However, one fermented food stands out as particularly beneficial—kefir.
Despite the conflicting information available online, kefir remains a powerful ally in promoting gut health, especially for those dealing with conditions like candida, SIBO, and digestive issues.
Kefir is a unique fermented drink with a rich history and an impressive array of health benefits. There are two main types of kefir: water kefir and milk kefir.
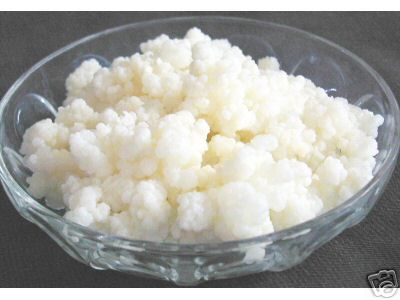
 Milk kefir can be made with cow’s milk, goat’s milk, sheep’s milk, or even more unusual options like camel or buffalo milk. Kefir grains, which are colonies of yeast and beneficial bacteria, ferment the liquid, transforming it into a nutrient-dense beverage.
Some of the key benefits of kefir include:
– Regulating cholesterol, blood pressure, and blood sugar levels
– Cleansing the digestive tract and supporting metabolism
– Healing digestive disorders like diarrhea, colitis, and IBS
– Boosting immune function and resistance to disease
– Improving liver and gallbladder function
– Treating skin conditions such as acne
– Providing anti-aging effects due to its high antioxidant content
Unlike yogurt, kefir offers a broader spectrum of probiotics, making it a more potent option for improving gut health.
Making your own kefir at home is surprisingly simple and requires just a few basic tools:
– Fresh milk or water (depending on the type of kefir you want to make)
– Kefir grains (or a starter kit)
– A large glass jar with a lid
– A plastic strainer
– A wooden spoon
Start by sterilizing your glass jar and lid with boiling water, then allow them to cool to room temperature. Place the kefir grains in the jar and pour the milk (or coconut milk, etc.) over them. Stir gently with a clean wooden spoon, ensuring the lid is loosely placed on the jar to allow excess pressure to escape.
Leave the jar undisturbed in a cool, dark place for up to 48 hours. The fermentation process can take anywhere from 12 to 48 hours, depending on factors like the quality of the kefir grains, the milk’s lactose content, and the temperature. The longer you let it ferment, the thicker and more sour the kefir will become.
Once your kefir is ready, give it a gentle stir and pour the contents through a plastic strainer into a glass bowl. Store the finished kefir in a glass jar in the refrigerator, where it will continue to ripen. Be sure to save your kefir grains for the next batch.
– Choose Quality Ingredients: Start with high-quality milk and kefir grains. Organic options often yield the best results.
– Ripen Your Kefir: Allowing your kefir to ripen for at least two days after fermentation increases its probiotic potency, which is especially beneficial for those with conditions like candida or SIBO.
– Experiment with Different Milks: While cow’s milk is a common starting point, don’t be afraid to experiment with goat’s milk, coconut milk, or even water kefir as you gain confidence.
Incorporating kefir into your diet is a simple yet powerful way to enhance your gut health and overall well-being. With regular consumption, you can enjoy a host of benefits, from improved digestion to better skin and a stronger immune system. Understanding the benefits of kefir and learning how to make kefir at home will empower you to take control of your health, naturally.